Reminder & Sender Settings
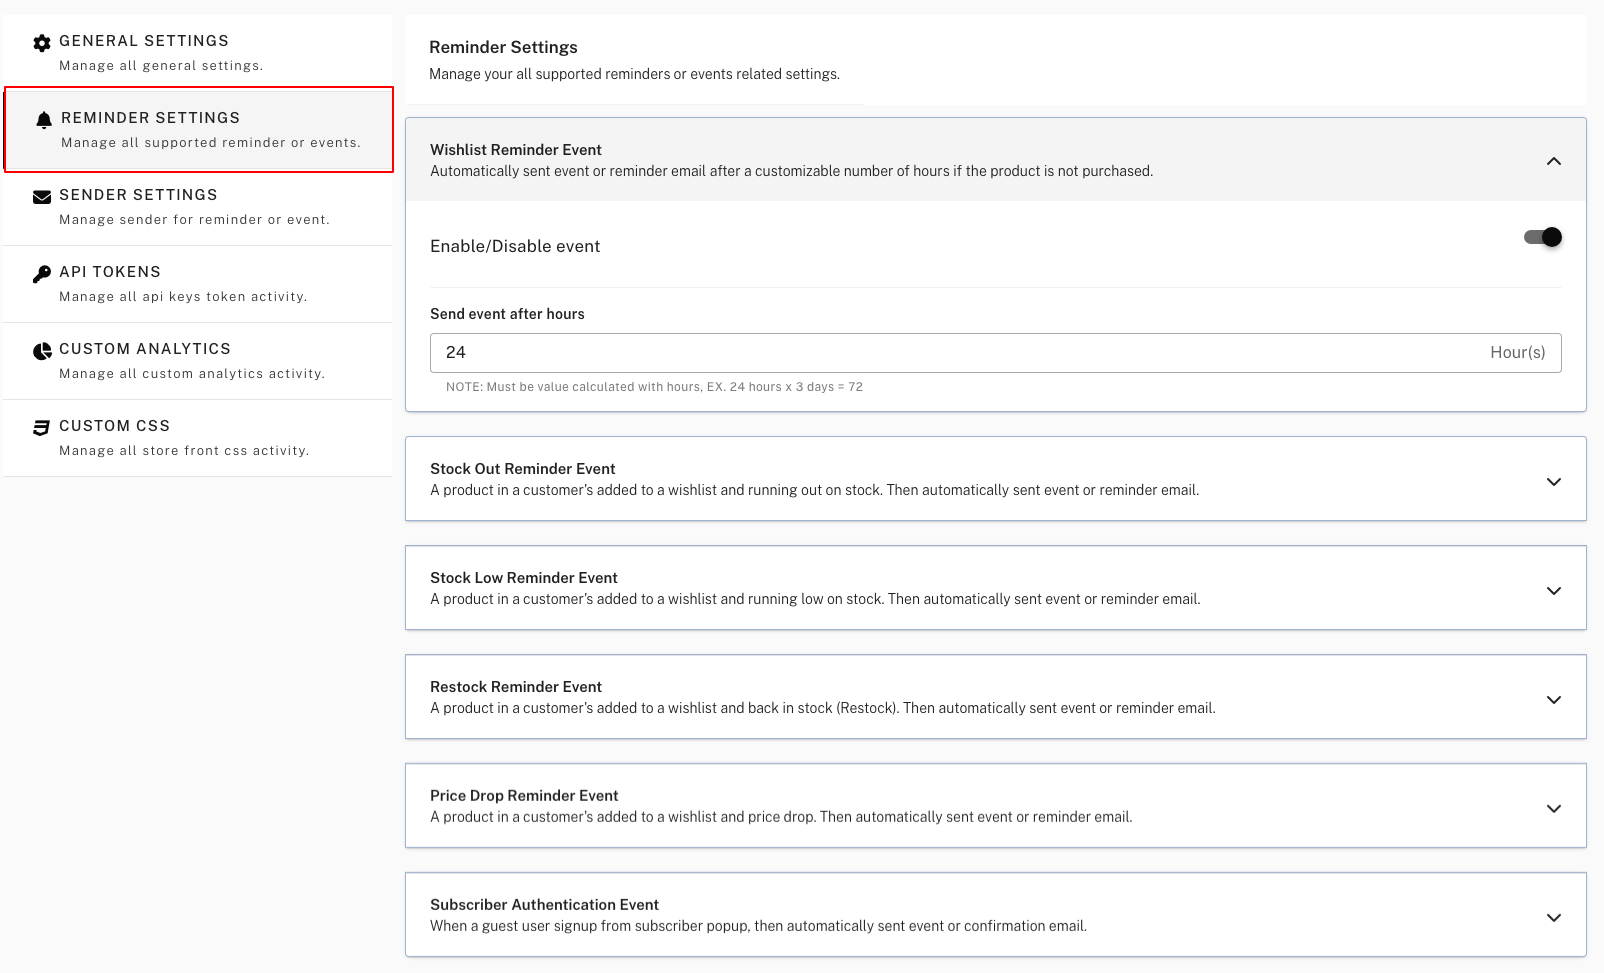
Reminder Settings let you enable or disable each reminder event and set options like delay and frequency. Configure which emails are sent and when. Reminder features may require a plan that includes reminders.
Where to find Reminder Settings
In the app, go to Settings → Reminder (or Reminder Settings from the Settings menu).
Reminder events
Each event can be turned on or off. For many events you can also set delay (e.g. hours before sending) and limits (e.g. max reminders per product or per customer).
Wishlist Reminder Event
Sent after a customizable number of hours if the customer hasn’t purchased the wishlisted product. Good for gentle nudges. Configure the delay (e.g. 24 hours, 72 hours) and optionally how many times to send.
Stock Out Reminder Event
Notifies the customer when a wishlisted product goes out of stock. Lets them know they might need to wait or choose an alternative. Enable/disable and adjust options as shown in the app.
Stock Out Reminder Event
Notifies the customer when a wishlisted product goes out of stock. Lets them know they might need to wait or choose an alternative. Enable/disable and adjust options as shown in the app.
Stock Low Reminder Event
Notifies when a wishlisted product’s inventory falls below a threshold (e.g. “Only 2 left”). Creates urgency. You can usually set the low-stock threshold in this section.
Restock Reminder Event (Stock In)
Sent when a wishlisted product comes back in stock. Very effective for converting saved items. Enable/disable and set any delay or limits.
Price Drop Reminder Event
Sent when a wishlisted product’s price decreases. Drives conversions from price-sensitive customers. Enable/disable and configure as needed.
Subscriber Authentication Event
Handles the confirmation email when a visitor subscribes to wishlist notifications (e.g. double opt-in). Ensures only confirmed emails receive reminders. Configure according to your compliance needs.
Per-event options
For each event you can typically:
- Enable or disable the event.
- Set delay (e.g. hours before sending).
- Set limits (e.g. max reminders per product or per customer).
Saving your changes
After changing any setting, click Save Changes. To design the emails, see Email Templates. To set the sending provider, see Sender Settings.
Sender Settings
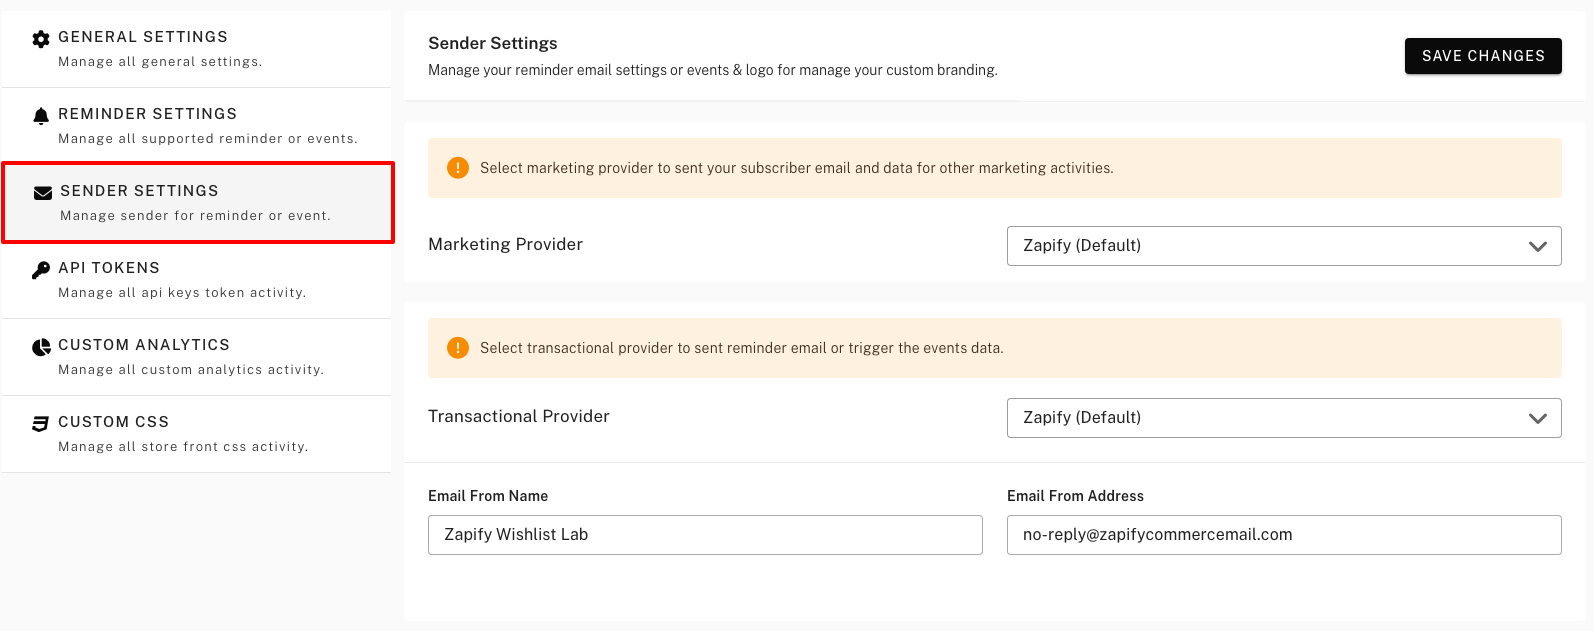
Sender Settings define how reminder and subscription emails are sent and how your branding appears in those emails. You choose marketing and transactional providers and set logo and colors. Complete this page after installing the app if you use reminders.
Where to find Sender Settings
In the app, go to Settings → Sender (or Sender Settings from the Settings menu).
Options explained
Marketing Provider
Used for marketing and subscriber data (e.g. syncing subscribers to your email platform for campaigns). Choose a provider such as Klaviyo, Mailchimp, or Omnisend. You must connect the provider under Integrations before it works. If you only send transactional reminders and don’t sync to a marketing tool, you may leave this unset or choose “None” if available.
Transactional Provider
Used to send reminder and event emails (wishlist added, price drop, restock, etc.). Select a provider that can send transactional email (e.g. Mandrill, or an integration like Klaviyo/Omnisend if they’re used for transactional sending). Connect the provider in Integrations and ensure the connection is complete; otherwise reminders may fail.
Custom Sender
Customize sender details:
- Email From Name – Set your store brand name/company name.
- Email From Address – Set your custom email address for the from email sender change.
NOTE: Custom sender will work with Zapify and Mandrill Provider only.
If you see an error
If you see an error like “Please complete your selected provider integration”:
- Go to Integrations in the app and open the provider you selected (e.g. Mandrill, Klaviyo).
- Enter credentials, verify the domain, or complete OAuth as required.
- Return to Sender Settings and save again.
Saving your changes
After any change, click Save Changes. To design the content of each email, see Email Templates. To connect or manage providers, see Integrations.