Custom CSS & Analytics
Custom CSS lets you add your own styles to the wishlist elements on your storefront (buttons, wishlist page, popups, etc.) so they match your theme. Use this when the Store Widgets editor isn’t enough. Availability may depend on your plan.
In the app, go to Settings → Custom CSS. You’ll see an editor where you can enter or paste CSS.

What you can style
You can target the classes and elements used by the app’s widgets. For example:
- Wishlist button – Size, color, border, hover state on product and collection pages.
- Wishlist page – Layout, typography, spacing, grid/list appearance.
- Popup and modal – Add-to-wishlist popup, subscriber popup, overlay.
- Toast/notification – Position, duration, and style of small messages (e.g. “Added to wishlist”).
Use your browser’s developer tools (Right-click → Inspect) on your storefront to find the class names the app uses, then write CSS rules for those classes in the Custom CSS editor.
How to use
- Open Settings → Custom CSS.
- Enter or paste your CSS in the editor. Your rules are applied in addition to the app’s default styles. Avoid
!importantunless needed to override theme conflicts. - Click Save Changes. The CSS is loaded on pages where the app’s widgets appear.
Tips
- Test on a development or preview theme first.
- Keep a backup of your CSS in a file; the app may not store history of past versions.
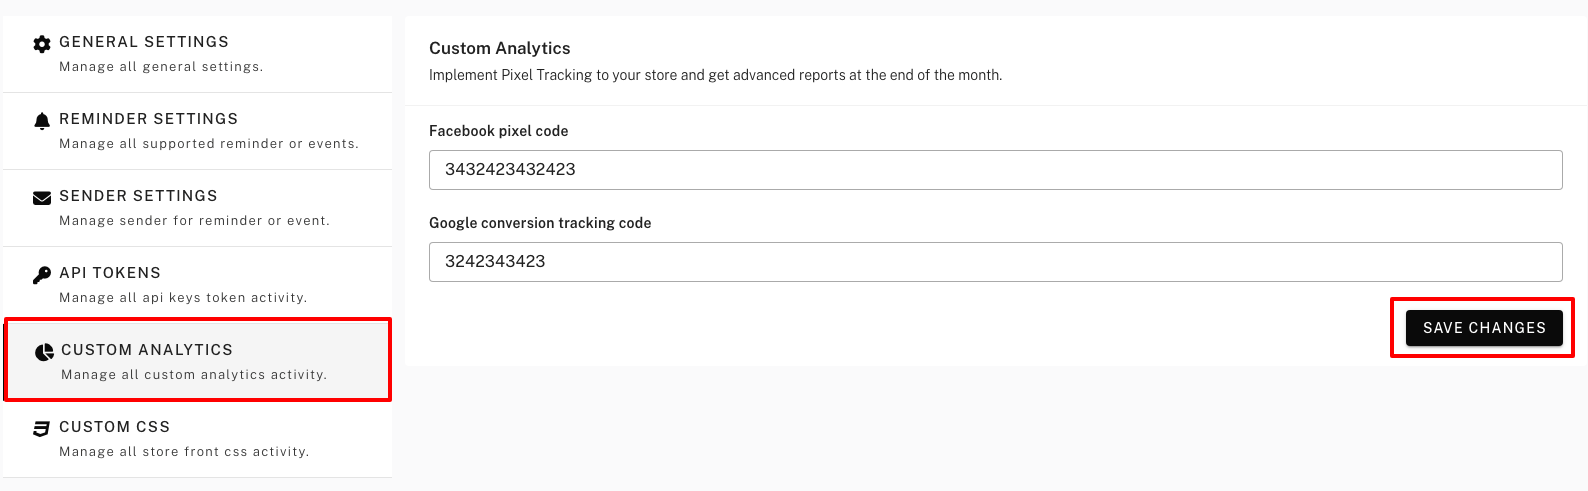
Custom Analytics
Custom Analytics lets you add Facebook Pixel and Google conversion tracking so you can measure wishlist and reminder performance in those platforms and get better reporting. Availability may depend on your plan.
Where to find Custom Analytics
In the app, go to Settings → Custom Analytics (or Analytics from the Settings menu).
Options explained
Facebook Pixel ID
Enter your Facebook Pixel ID (e.g. numeric like 2XXXXXXXXXXXXX ). The app will load the pixel on relevant pages (e.g. wishlist page, post-purchase) so you can:
- Track wishlist and reminder-related events in Facebook Events Manager.
- Build audiences and run campaigns based on wishlist behavior.
Where to get it: Facebook Business Manager → Data Sources → Pixels. Copy the Pixel ID and paste it into the app.
Google conversion tracking
Enter your Google Analytics or Google Ads tracking ID (e.g. UA-XXXXXXXX-1 for Universal Analytics, or the measurement ID for GA4). The app can send or attribute events so you can:
- See wishlist and conversion data in Google Analytics.
- Use the data for Google Ads conversion tracking and optimization.
Where to get it: Your Google Analytics or Google Ads account (Admin → Property → Data Streams for GA4, or conversion setup for Google Ads).
Saving and verifying
Click Save Changes after entering or updating the codes. Changes usually take effect on the next page load. Verify in Facebook Events Manager or Google Analytics that events are firing as expected (e.g. AddToWishlist, ViewWishlist).
Related
For changing layout and options of widgets (e.g. button text, page layout), use Templates → Store Widgets. See Store Widgets.