REST API for Shopify Headless & Mobile App
API Tokens let you create and manage API keys for integrating with the Wishlist Lab REST API (e.g. from your own app, script, or headless storefront). Use tokens when you need programmatic access; for built-in integrations like Klaviyo or Mailchimp, use Integrations instead.
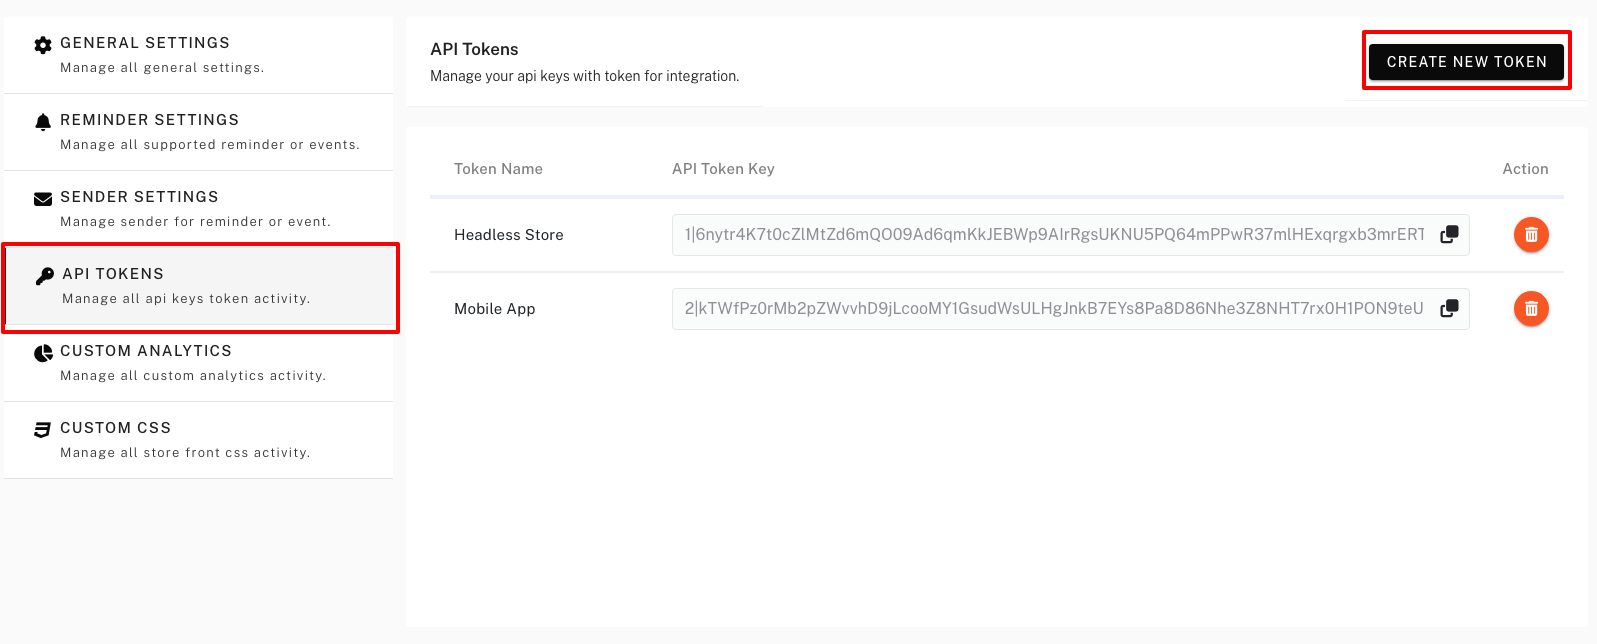
Where to find API Tokens
In the app, go to Settings → API Tokens.
How to create a token
Step 1: Open API Tokens
Go to Settings → API Tokens.
Step 2: Create New Token
Click Create New Token. Enter a Token name (e.g. “Mobile App” or “Headless app”) so you can identify it later. Click Create.
Step 3: Copy the token once
After creation, the app will show the token once. Copy and store it securely; you won’t be able to see the full value again. If you lose it, create a new token and revoke the old one.
Using the token
Use the token in API requests as required by the app (e.g. in a header such as Authorization: Bearer YOUR_TOKEN or as a query/body parameter). Check the app’s API documentation for the exact base URL and authentication method. For headless and mobile, See REST API for Headless & Mobile from below.
Managing tokens
- View – The list shows existing tokens by name and creation date; the secret is not shown again.
- Revoke (delete) – Remove tokens you no longer need. Revoked tokens stop working immediately.
Shopify Headless & Mobile App
Wishlist Lab provides a REST API so you can add wishlist functionality to Shopify headless storefronts (e.g. Hydrogen, Next.js, custom React/Vue) and native or cross-platform mobile apps. There are no theme or Liquid dependencies — you call the API from your frontend or app and manage wishlists, items, and subscribers programmatically.
→ Full endpoint reference: Wishlist Lab REST API Documentation
Who this is for
- Headless storefronts – Custom storefronts built with Hydrogen, Next.js, Remix, or any stack that talks to Shopify and other APIs. Use the Wishlist Lab API to add-to-wishlist, list wishlist items, remove items, and sync with the app’s reminder and subscriber features.
- Mobile apps – iOS, Android, or cross-platform apps (e.g. React Native, Flutter) that sell via Shopify. Same API: manage wishlists and optional subscriber signup from within the app.
1. Get an API token
Access to the API is controlled by API tokens. Create a token in the app and use it in every request.
- In the app, go to Settings → API Tokens.
- Click Create New Token.
- Enter a Token name (e.g. “Headless storefront”, “Mobile app”, “Hydrogen”) and click Create.
- Copy the token immediately — it is shown only once. Store it securely (e.g. environment variable or secure storage in the mobile app).
Use separate tokens for headless vs mobile, or for development vs production, so you can revoke or rotate them independently.
2. Base URL and authentication
All endpoints use the base path /api/v1 . For example, if your app is hosted at https://your-app-domain.com , the full base URL is:
https://your-app-domain.com/api/v1
Send your API token with every request using the Authorization header:
Authorization: Bearer YOUR_API_TOKEN
Replace YOUR_API_TOKEN with the token you created in Settings → API Tokens. Unauthenticated requests receive 401 Unauthenticated .
Security: In headless storefronts, do not expose the token in client-side JavaScript. Call the Wishlist Lab API from your backend (e.g. serverless function, BFF) or use a proxy that adds the token server-side. In mobile apps, store the token in secure storage and send it only in outbound API requests; do not embed it in the app binary in plain text.
3. Full API documentation
For complete endpoint reference, request/response formats, parameters, and examples, use the official API docs:
Wishlist Lab REST API Documentation →
The docs cover guest wishlist endpoints (add, list, count, remove, status using unique_device_id ), customer wishlists and items (using customer_id and wishlist_id ), and shop settings. Use that as the source of truth when building your headless or mobile integration.
4. Headless storefront (e.g. Hydrogen, Next.js)
In a headless setup:
- Keep the API token on the server (e.g. in env vars). Create a server route or serverless function that receives actions from your frontend (e.g. “add to wishlist”, “get wishlist”) and forwards them to
/api/v1/...with theAuthorization: Bearerheader. - For guests: generate and persist a
unique_device_id(e.g. UUID) on first visit (e.g. cookie or localStorage) and send it with every guest wishlist request (/guest/wishlist/items/add,/guest/wishlist/items, etc.). - For logged-in customers: pass the Shopify
customer_idfrom your session. Use/customer/wishlist/listsand/customer/wishlist/{id}/itemsor the item add/status/count/remove endpoints. The app can merge guest wishlist data when the customer logs in if you use the sameunique_device_idbefore and after login. - Call
GET /shop/settingsto get store settings and widget config so you can show/hide features or labels. Render the wishlist UI from the list endpoints and handle loading and error states.
5. Mobile app
In a mobile app:
- Store the API token in secure storage (e.g. Keychain, Keystore). If the app is multi-tenant or per-store, use the appropriate token for the active store.
- Call the API over HTTPS (directly from the app or via your backend that holds the token). Use the same base URL
/api/v1and endpoints: guest endpoints withunique_device_id, or customer endpoints withcustomer_idandwishlist_idwhen logged in. - Generate and store
unique_device_idper device (e.g. first launch) and use it for all guest wishlist calls. After login, use the customer endpoints with the Shopify customer ID from your auth.
6. Managing tokens
In Settings → API Tokens you can:
- View – List of token names and creation dates (the secret is not shown again).
- Revoke – Delete a token. Revoked tokens stop working immediately. Use this when retiring an integration or rotating credentials.
Revoke and create new tokens if you suspect a token was exposed or when switching from dev to production.
Security summary
- Do not share tokens or commit them to version control.
- Use one token per application or environment (headless vs mobile, dev vs prod).
- In headless: call the API from the server and never expose the token to the browser.
- In mobile: store the token in secure storage and avoid hardcoding it in the app.
- Revoke tokens when they are no longer needed or if compromise is suspected.