Widget Installation: Manual (copy code into theme)
Use this method for Online Store 1.0 themes or whenever you want to paste code yourself. Collection page and Cart page widgets are always added this way, even on Online Store 2.0. Get each snippet from the app: Installation → Manual Setup, then expand the panel and copy the code.
Where to get the code
In the app, go to Installation. Under Manual Setup, expand the panel for each widget and use the copy button. Paste into the theme file at the position described below.
1. Product page button
Shows the “Add to wishlist” button on the product page.
- In Shopify admin: Online Store → Themes → Edit code.
- Open Sections → main-product.liquid (or your theme’s main product section).
- Paste the snippet from the app at the desired position (e.g. near the Add to cart button). Save.
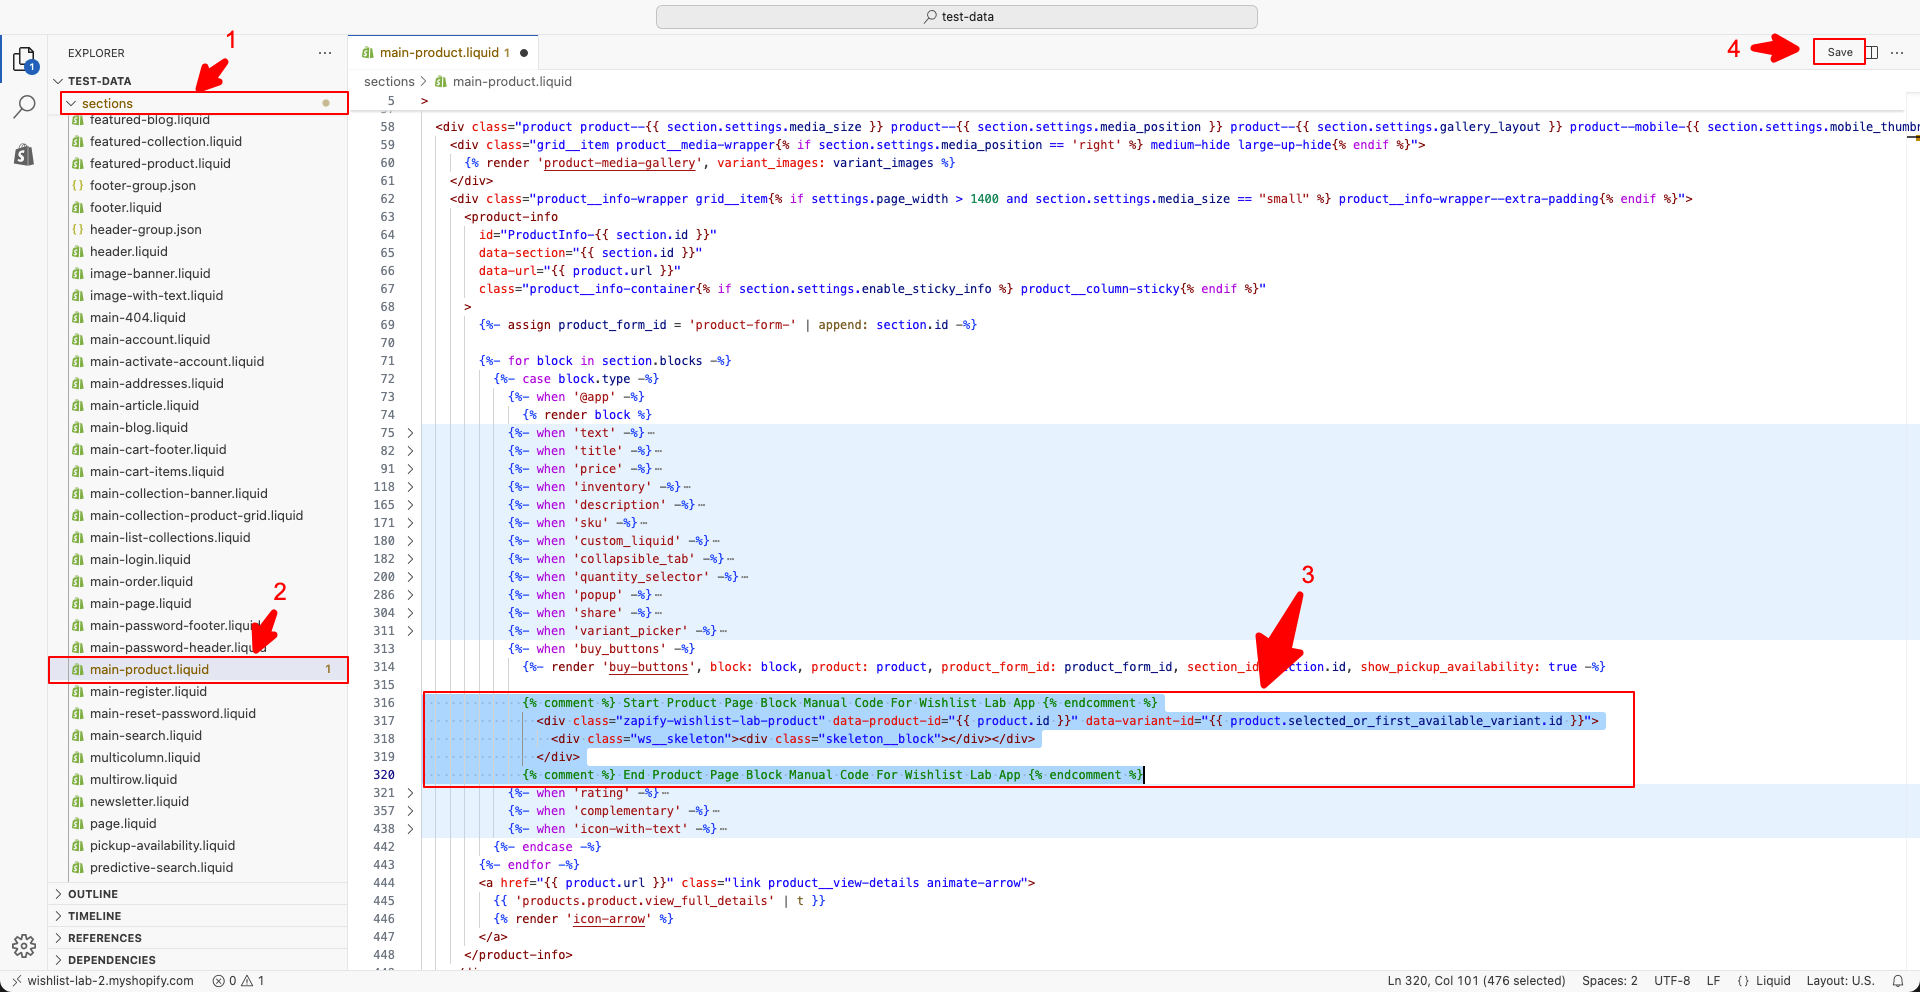
{% comment %} Start Product Block Manual Code For Wishlist Lab {% endcomment %}
<div class="zapify-wishlist-lab-product" data-product-id="{{ product.id }}" data-variant-id="{{ product.selected_or_first_available_variant.id }}">
   <div class="ws__skeleton"><div class="skeleton__block"></div</div>
</div>
{% comment %} End Product Block Manual Code For Wishlist Lab {% endcomment %}
2. Collection page button
Shows the wishlist button on each product card on collection pages. Manual for both OS 1.0 and 2.0.
- Open Snippets → collection-grid.liquid OR card-product.liquid (or the snippet that renders each product card on the collection page).
- Paste the collection page button code from the app into the desired position for each product card. Save.
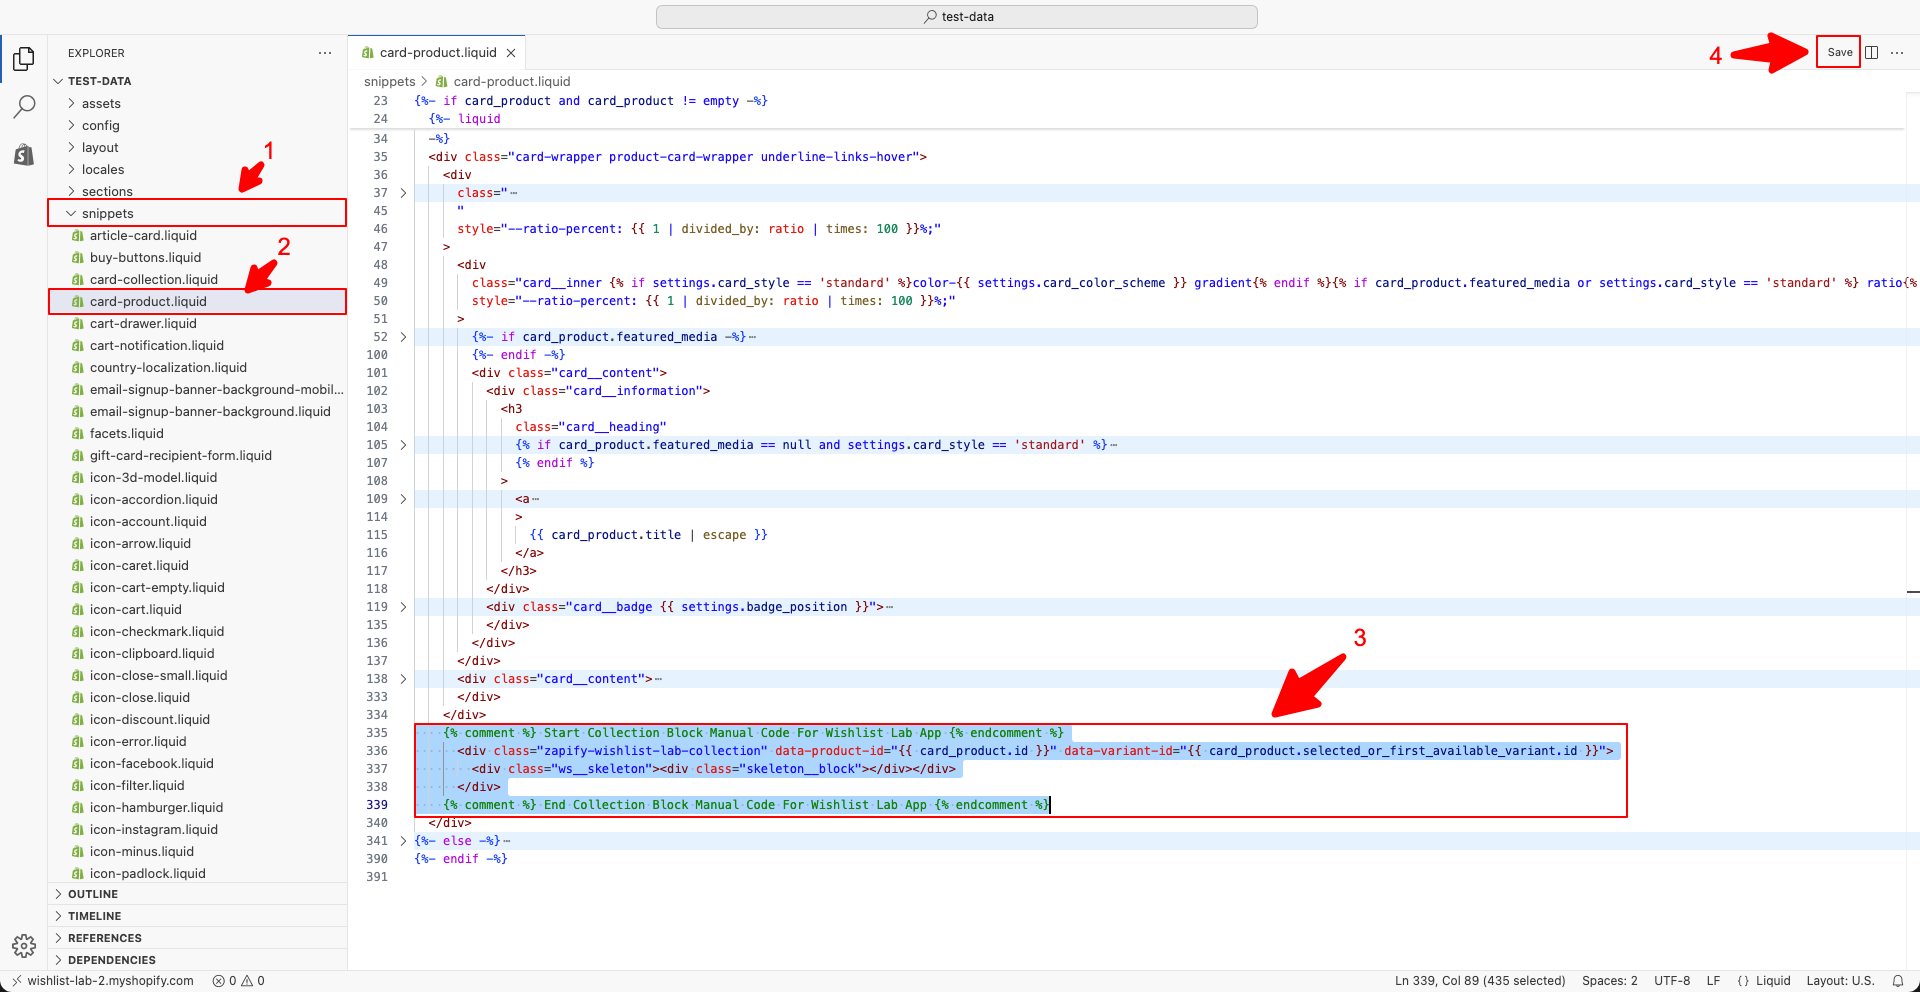
{% comment %} Start Collection Block Manual Code {% endcomment %}
<div class="zapify-wishlist-lab-collection" data-product-id="{{ card_product.id }}" data-variant-id="{{ card_product.selected_or_first_available_variant.id }}">
   <div class="ws__skeleton"><div class="skeleton__block"></div></div>
</div>
{% comment %} End Collection Block Manual Code {% endcomment %}
3. Save for later button (cart page)
Let's customers move cart items to the wishlist. Manual for both OS 1.0 and 2.0.
- Open Sections → main-cart-items.liquid
- Paste the cart page button code where you want the “Save for later” control for each line item. Save.
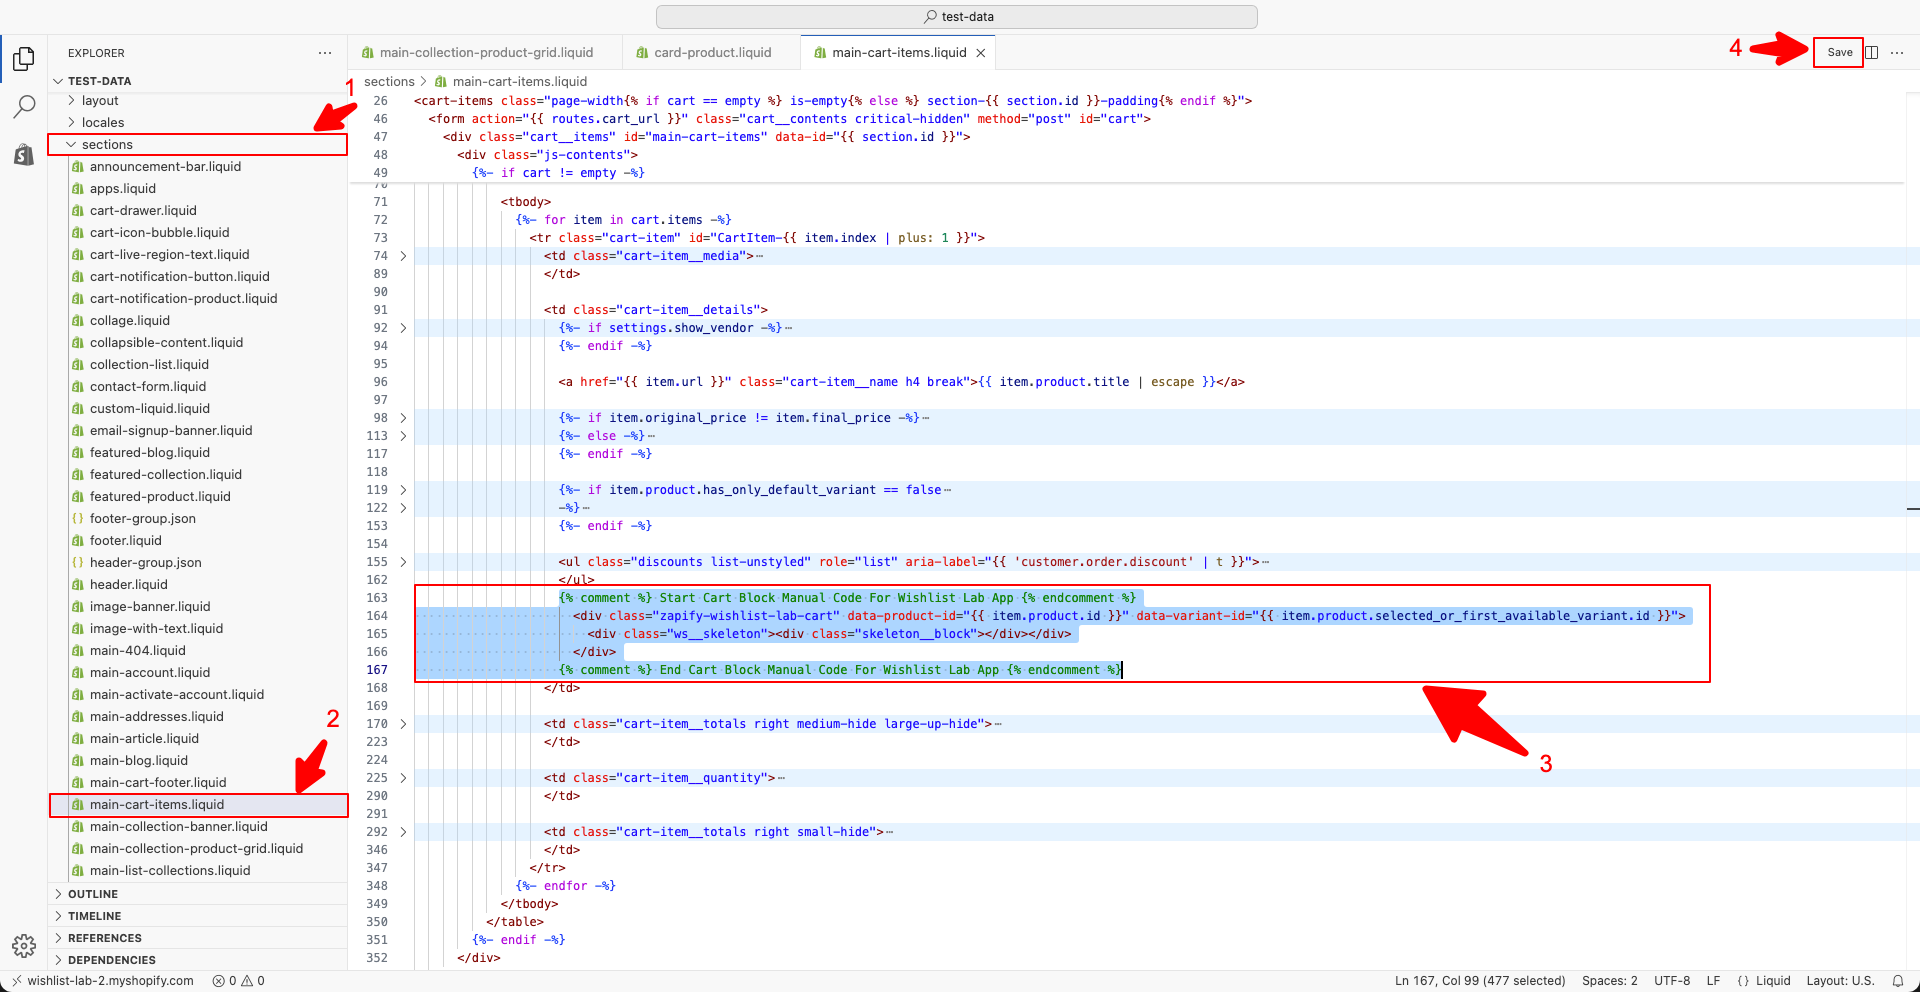
{% comment %} Start Cart Block Manual Code For Wishlist Lab App {% endcomment %}
<div class="zapify-wishlist-lab-cart" data-product-id="{{ item.product.id }}" data-variant-id="{{ item.product.selected_or_first_available_variant.id }}">
   <div class="ws__skeleton"><div class="skeleton__block"></div></div>
</div>
{% comment %} End Cart Block Manual Code For Wishlist Lab App {% endcomment %}
4. Header menu link to wishlist page
Adds a link or icon in the header so customers can open their wishlist page.
- Open Sections → header.liquid
- Paste the header menu code in the navigation area where you want the wishlist link. Save.
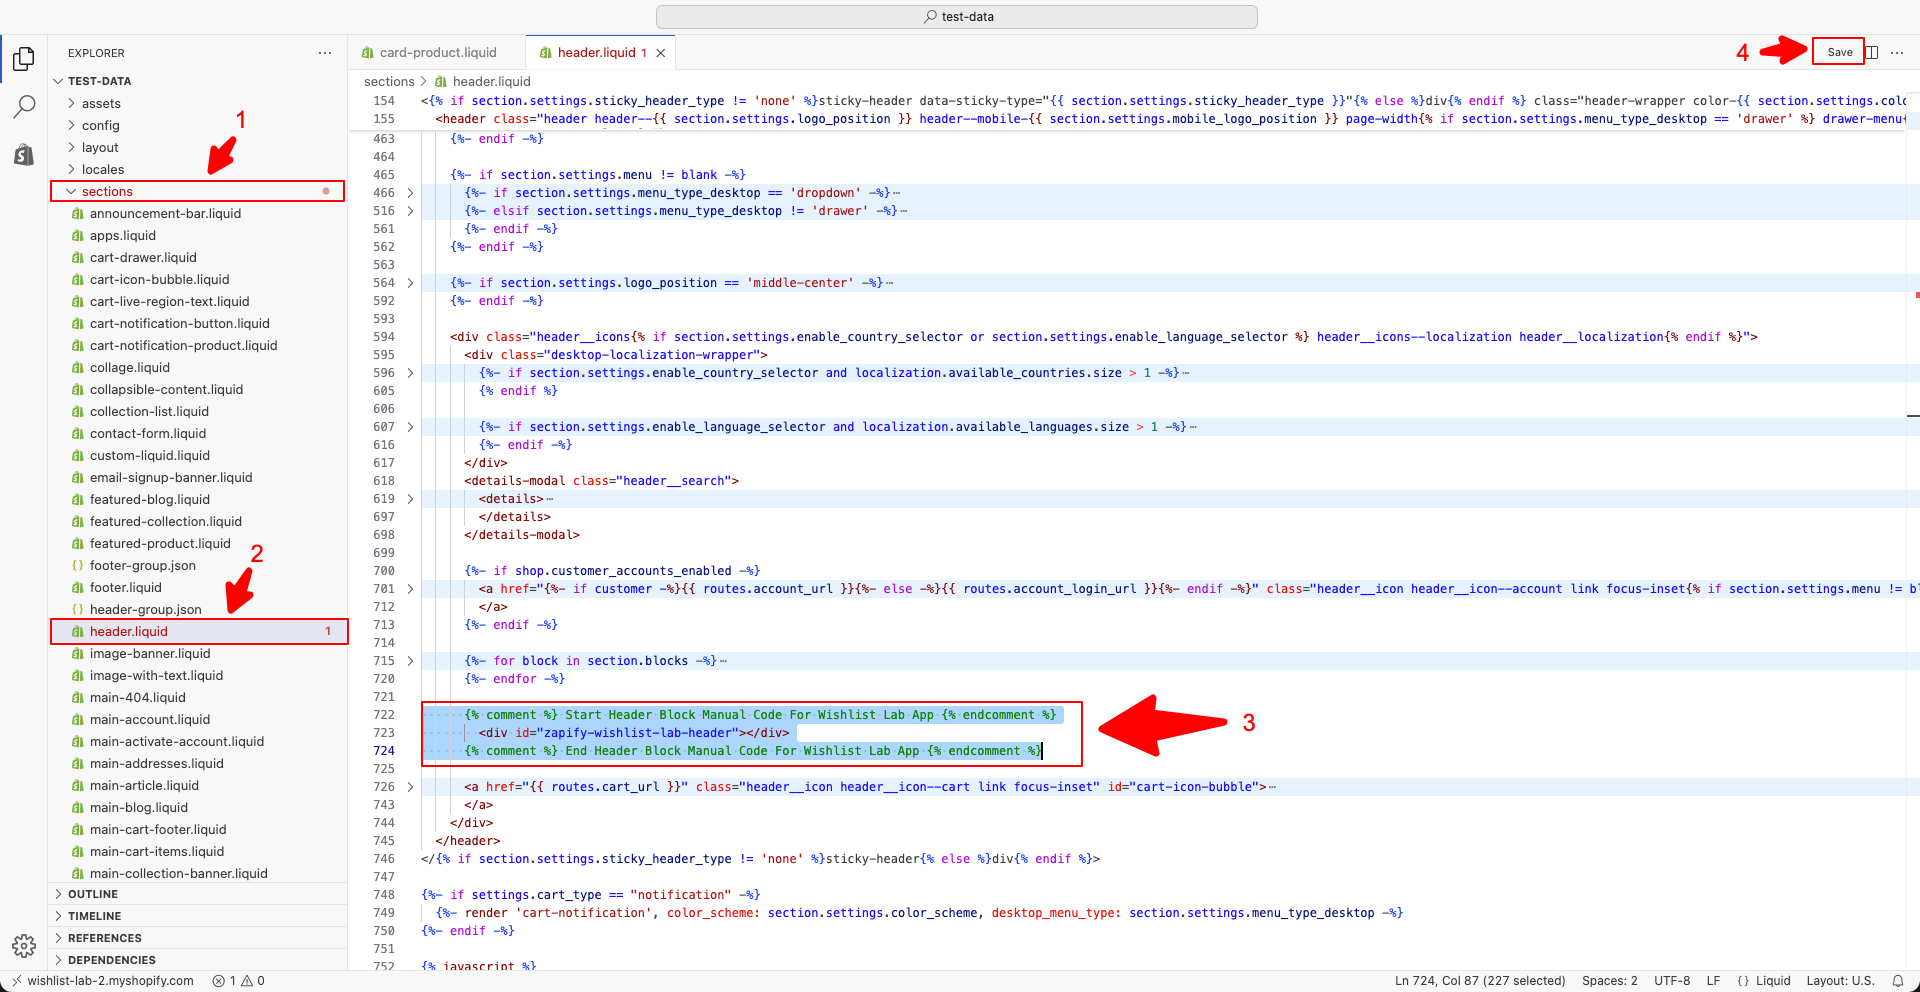
{% comment %} Start Header Menu Block Manual Code {% endcomment %}
<div id="zapify-wishlist-lab-header"></div>
{% comment %} End Header Menu Block Manual Code {% endcomment %}
5. Wishlist page (show user items)
Creates the “My Wishlist” or "Wishlist Lab" page where customers see their saved items.
- Create a new Page in Shopify (e.g. “Wishlist Lab”) and click on the "Show HTML" block inside the content section.
- In the page, paste the wishlist page code from the app. Save.
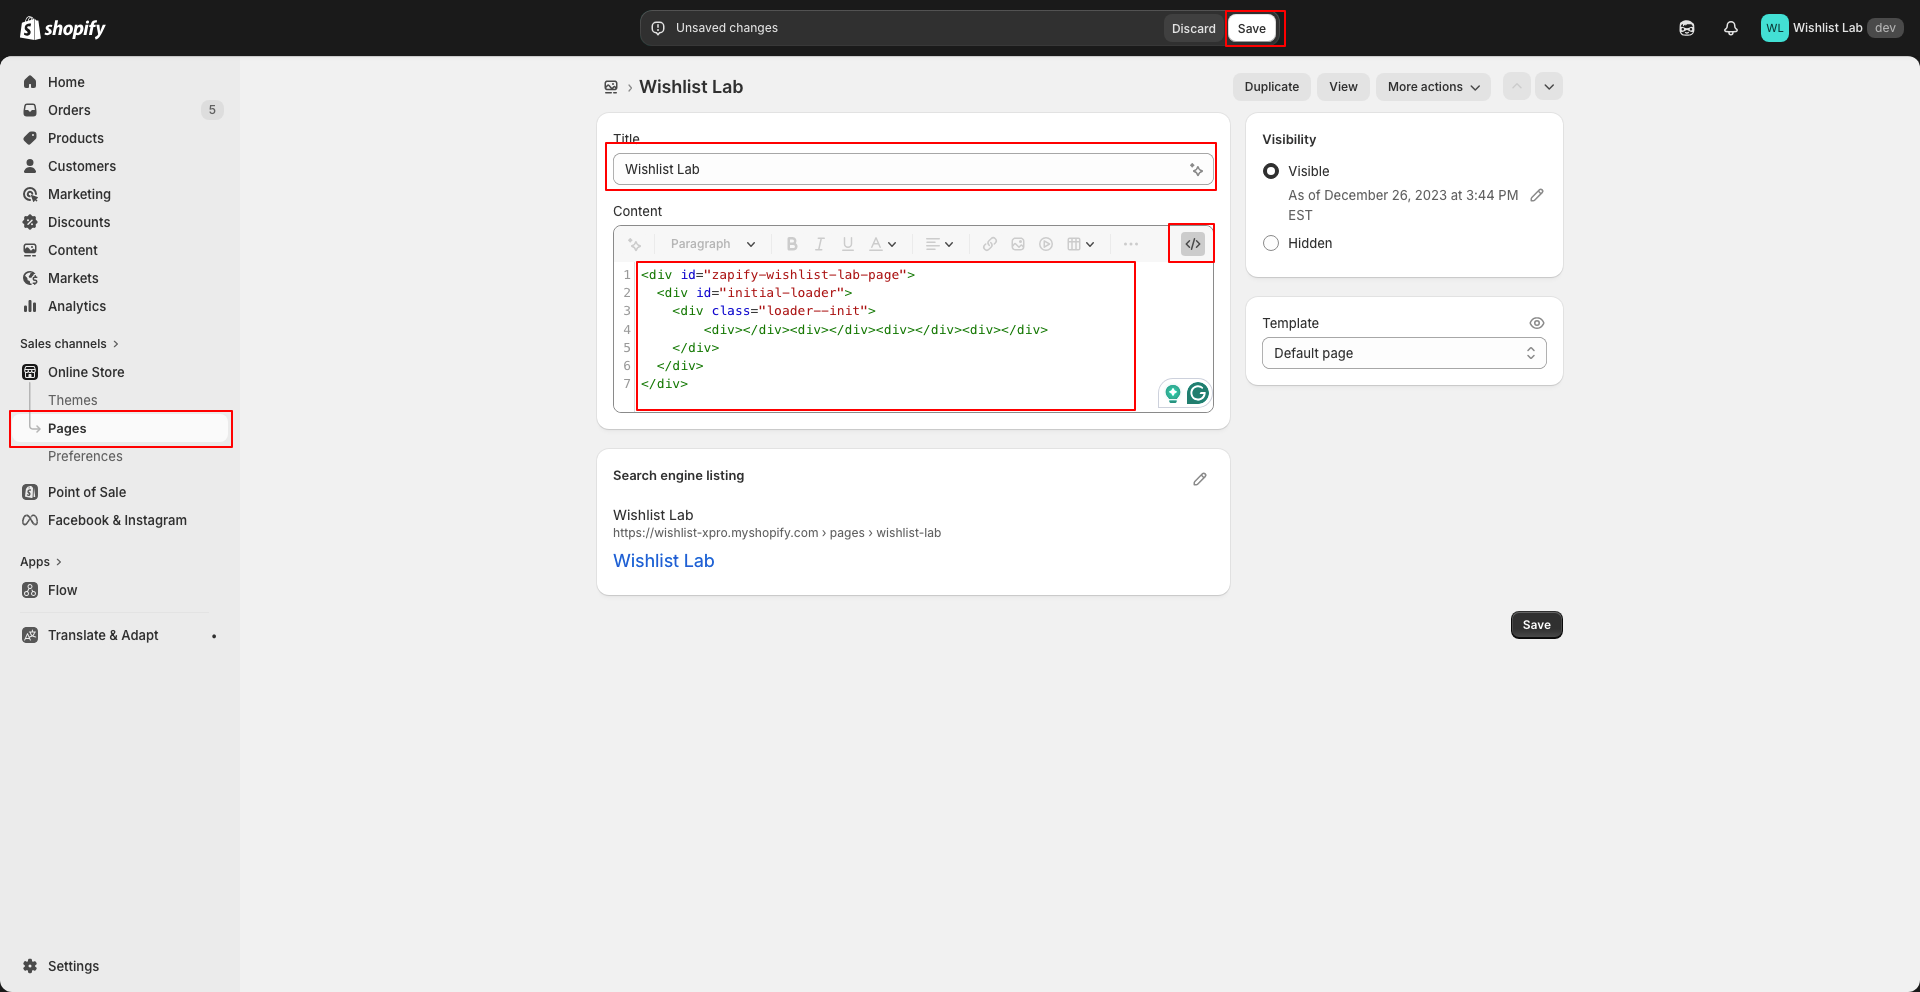
<div id="zapify-wishlist-lab-page"><div id="initial-loader"><div class="loader--init"><div></div><div></div><div></div><div></div></div></div></div>
If a button or link doesn’t appear, your theme may use different file names; paste the same snippet into the file that renders that part of the page. To customize appearance, use Templates → Store Widgets in the app.